The organizational charts can be displayed on your Jira dashboards by using the Organizational Chart gadget. For the organizational chart to be generated, you must have a user custom field of type User Picker representing the hierarchical relationship between the Jira users. Also, the fields must be properly set on the user's Advanced Profile page. See "Adding a user custom field" above for how to add such field.
Assuming that you already have a dashboard created and at least one User Picker custom field defined and set on the user Advanced Profile page, follow these steps to display the organizational chart:
-
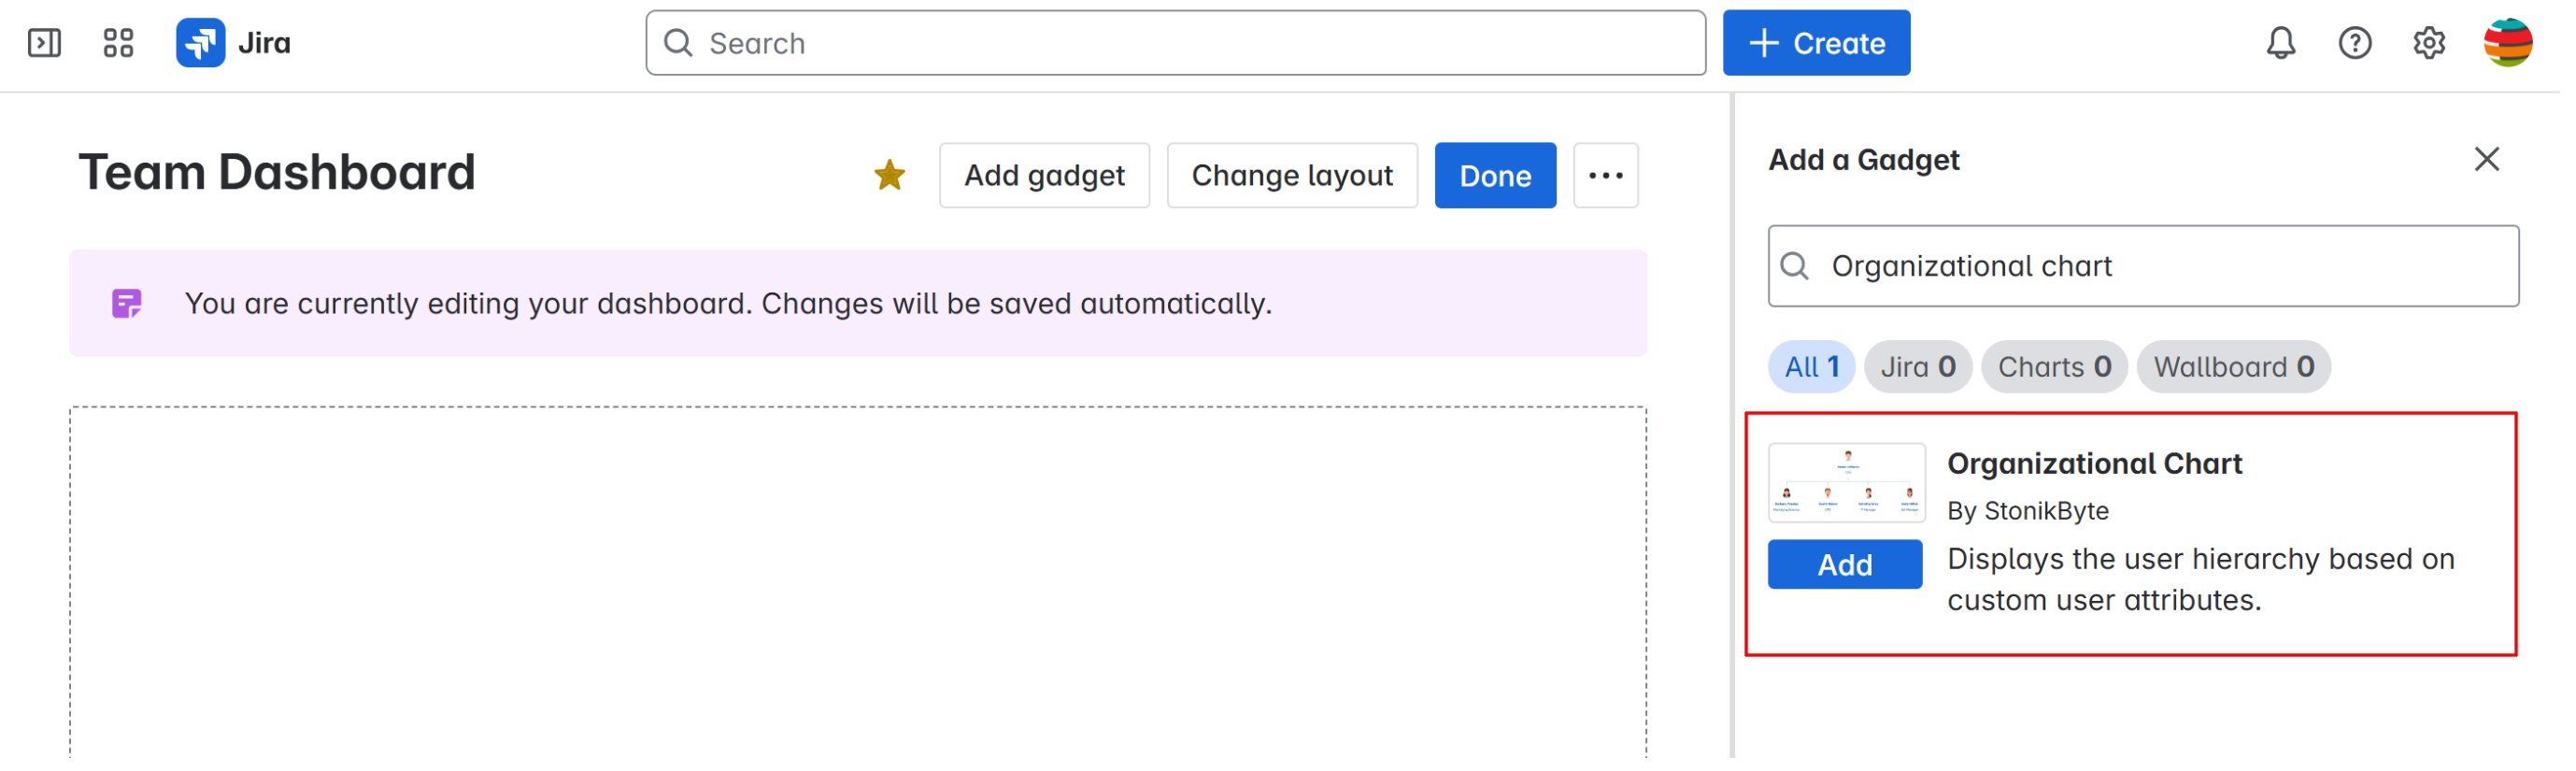
Go to your Jira dashboard and click Add gadget
-
Search for the org chart gadget and add it
-
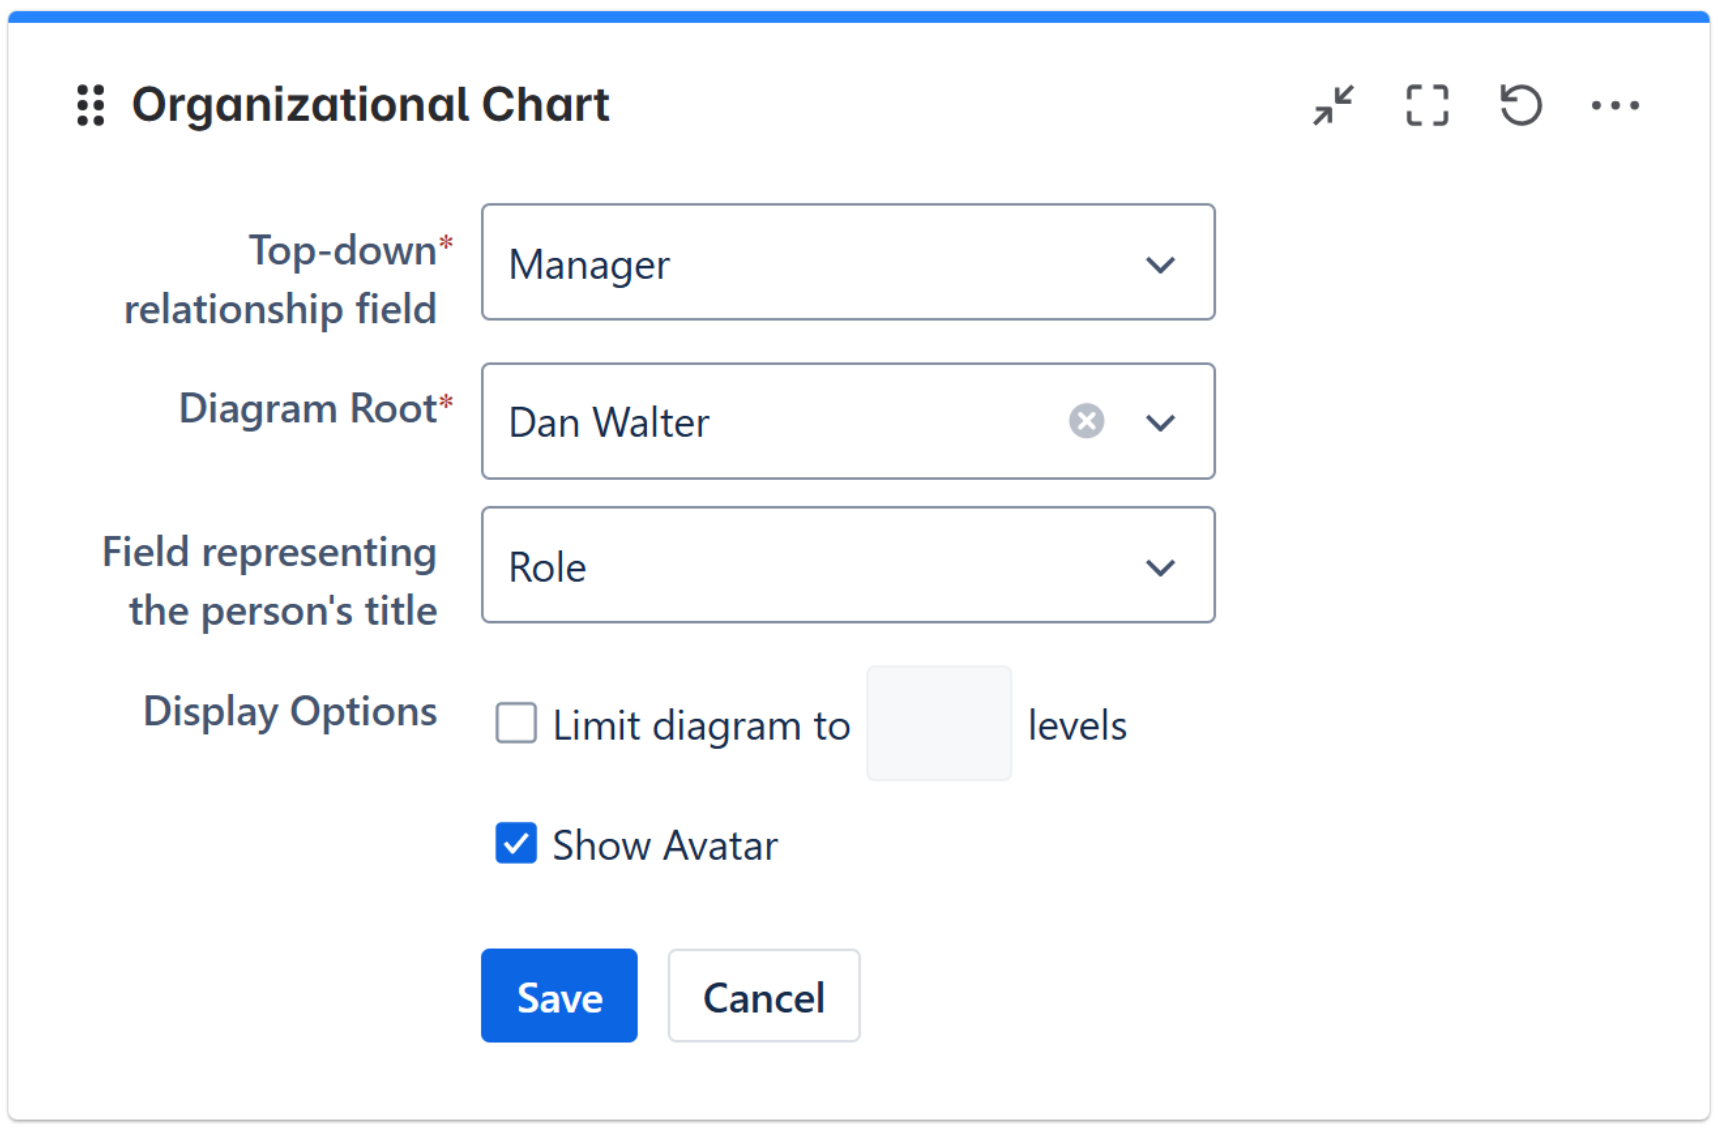
Enter the gadget settings as described in the table below
|
Setting |
Description |
|---|---|
|
Top-down Relationship Field |
The user custom field defined in the app settings, representing the hierarchical relationship between the Jira users. |
|
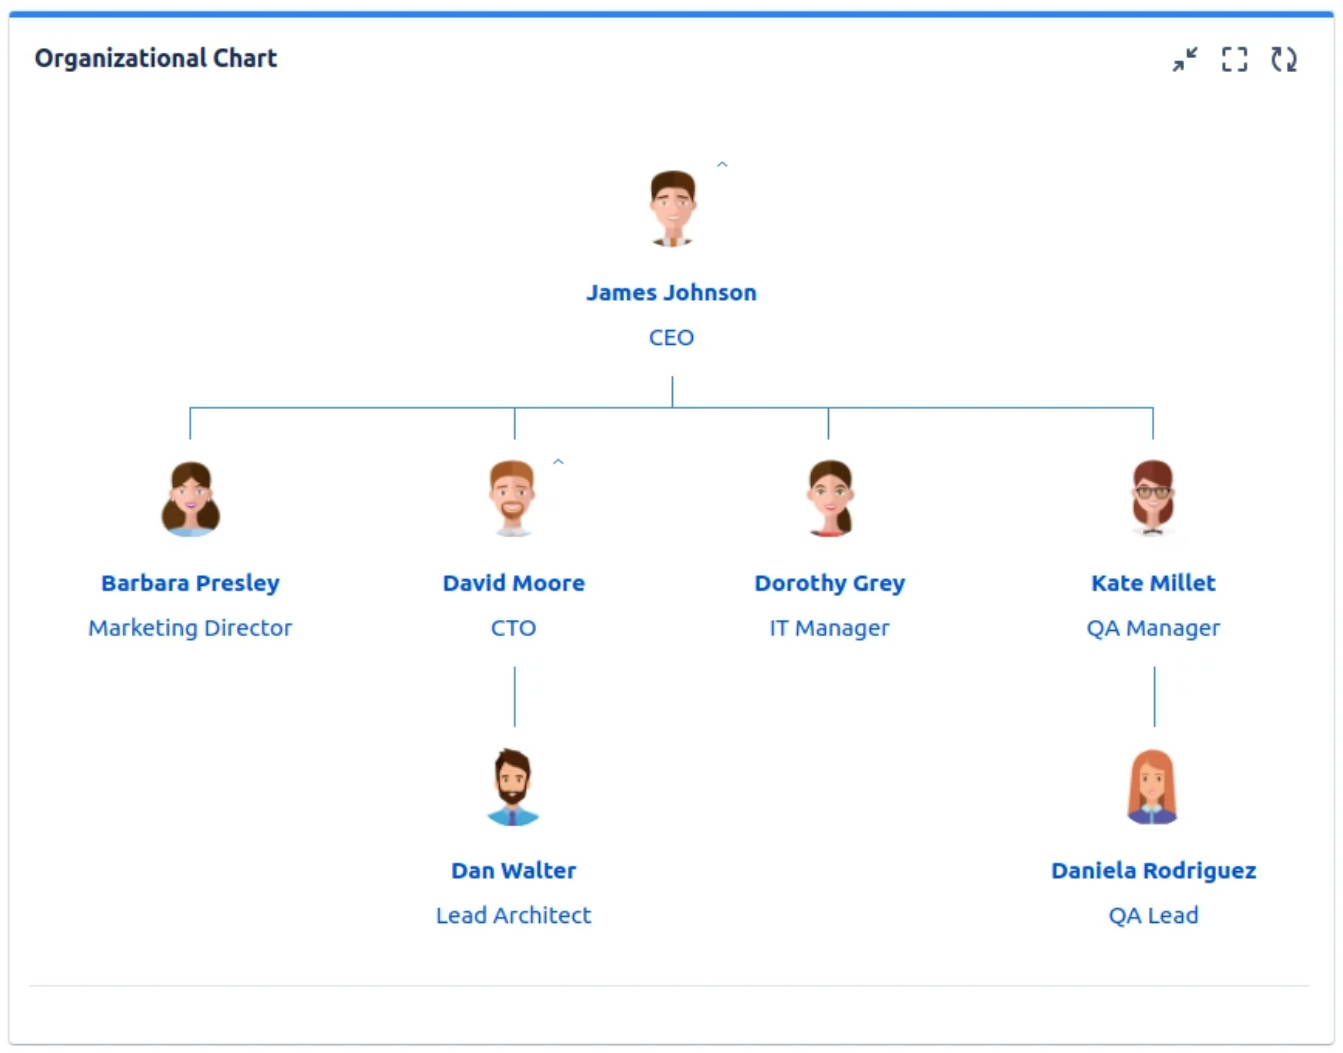
Diagram Root |
Represents the Jira user that will be displayed on the top-level of the chart. In case of a company org chart, this is usually the CEO. Use the Search user and then select the user. |
|
Field representing the person's title |
Is a user custom field of type Text or Multi Value Picker defined in the app settings that usually represents the job title/titles of the person. The value of this field will be displayed in the org chart under the user's full name. When a field contains multiple values, they will be displayed as a comma-separated list under the user's full name. |
|
Limit Diagram to ? levels |
Indicates the maximum number of levels the org chart can have. |
|
Show Avatar |
Indicates if the user avatars will be displayed in the org chart. |
-
Click Save. The organizational chart will be generated and displayed on your dashboard.