
If you just installed Documents in your Jira Cloud instance, you might want to upload the existing project-related files to the Jira projects.
Follow these steps to bulk import existing files and folders into a Jira project:
-
Centralize all the files to be imported in a folder on your local computer. You can organize these files in sub-folders as necessary.
-
Make sure that the Documents app has been installed and configured and you can access the Documents tab of the Jira project where the data will be imported.
-
Download Bulk Documents Uploader on your local computer.
|
Platform |
Download |
|
Windows 64-bit |
|
|
Linux 64-bit |
-
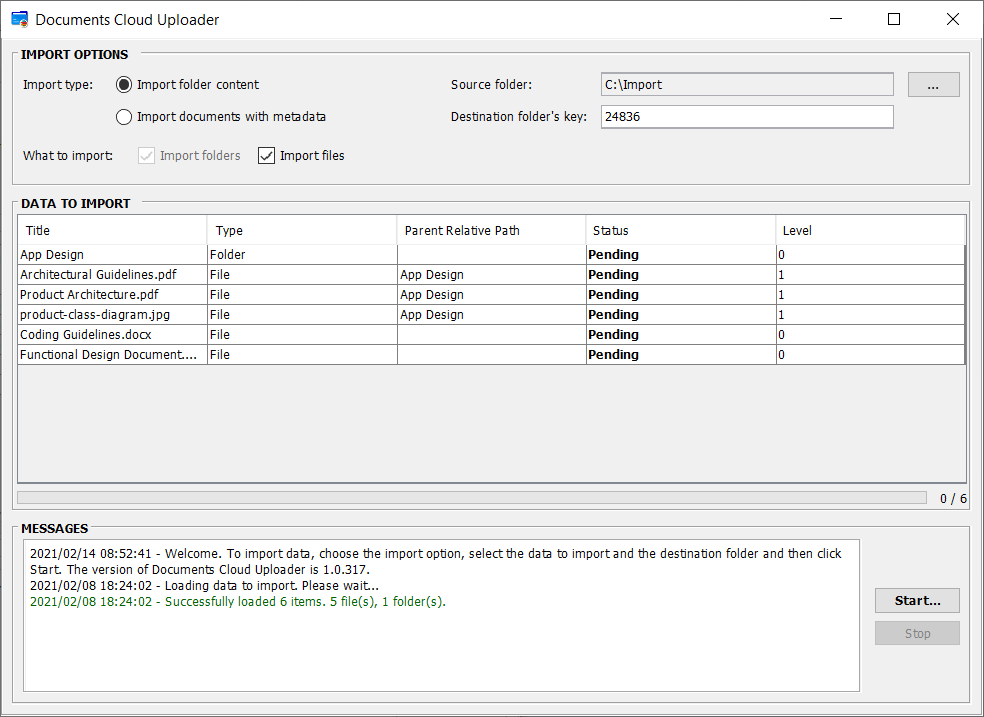
Extract the downloaded archive and open it. Execute run_gui.bat if you are on Windows or run_gui.sh if you are on Linux. The Documents Cloud Uploader will open.
-
At Import type, choose Import folder content.
-
At Source folder, click ... and select the folder that contains the data to be uploaded. The folder content will be loaded in the DATA TO IMPORT table. Check for eventual errors in the MESSAGES field.
-
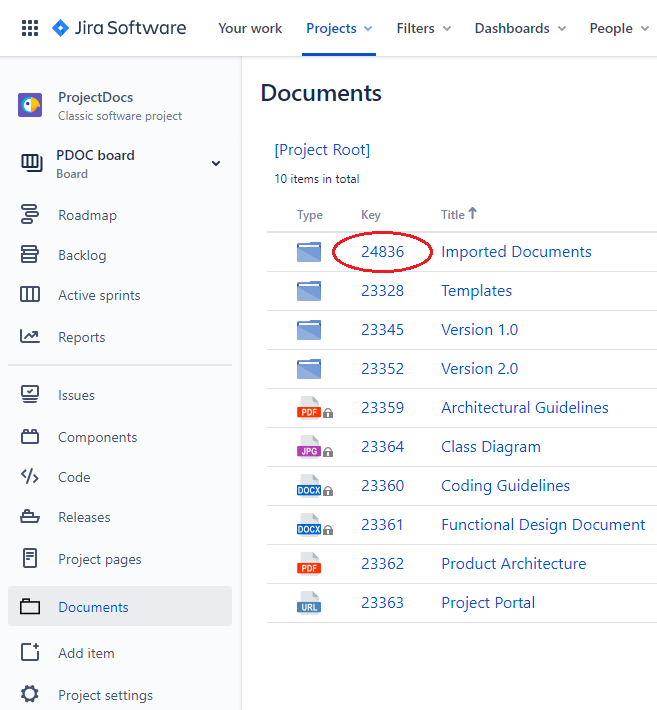
At Destination folder's key, you have to enter the key (id) of the existing folder from Documents where the data will be imported. To determine the key:
-
Log on to your Jira Cloud instance
-
Open the Jira project where you want to import the data
-
Click the Documents tab
-
Navigate and locate the folder where the files will be uploaded
-
Note down its key.
-
-
If you want to import the files in the project's root folder, hover the mouse over the [Project Root] in the navigation bar. Its key will be displayed in a tooltip.

If the key is displayed as a negative number, please reload the page and try again.
-
At What to Import, make sure that Import folders and Import files are both checked. If you want to just import the folder structure, uncheck Import files.
-
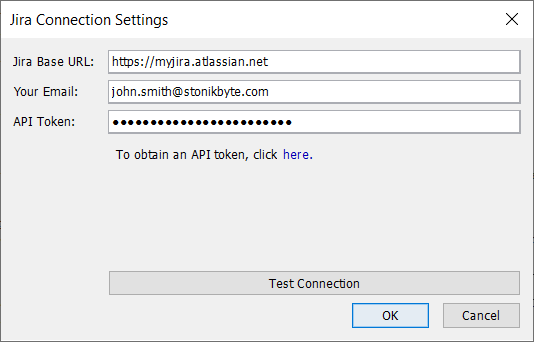
Click Start.... The "Jira Connection Settings" dialog will appear. Enter the information required by the app to connect to your Jira Cloud instance:
-
At Jira Base URL, enter the base URL of your Jira Cloud instance in form of "https://myjira.atlassian.net".
-
At Your Email, enter the email address of your Jira Cloud account.
-
At API Token, you must enter a valid API token. Use the link offered in the dialog box to generate an API token. You can revoke the generated token after you finish importing the data.
-
Click Test Connection to validate the provided connection info. If the test fails, please double-check the info provided and try again.
-
-
Click OK in the "Jira Connection Settings" dialog to continue the import process.
-
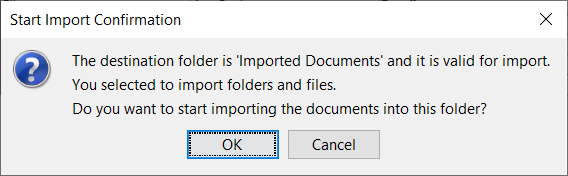
The app is trying to connect to your Jira Cloud instance to check if the destination folder exists. If it exists, a confirmation dialog will pop up.
-
Click OK in the confirmation dialog to start the import. The app will proceed with the import of the documents, starting with the folders.
-
Check for any errors in the MESSAGES field. When it is done, check the content of the destination folder from Jira Cloud; it should display the imported documents.