
Creating a new custom field
The Documents app includes a predefined set of fields for documents. However, you can also create and use additional custom fields. To do this, you must first create the custom fields in the repository project and then configure them in the app settings.
Custom fields apply only to documents of type File and URL; they are not supported for folders.
Follow the steps below to add a custom field for use with documents:
-
Log in to your Jira instance as an administrator.
-
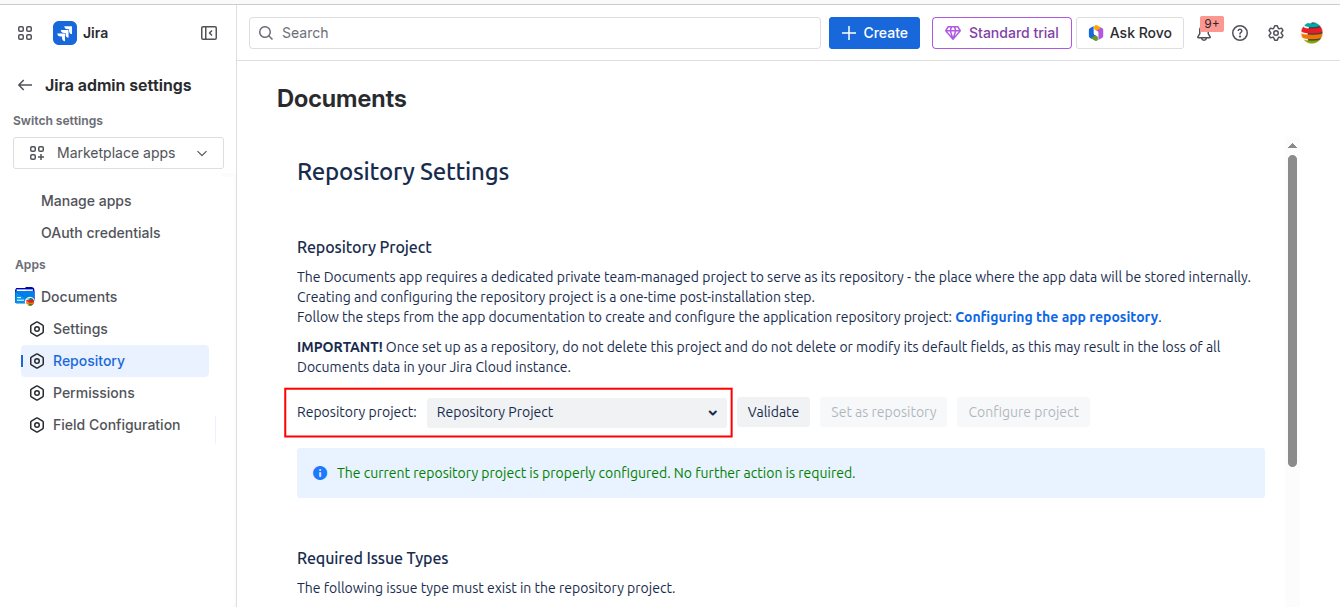
Navigate to Marketplace Apps > Documents > Repository to identify the Jira project (space) that is used as the repository project for the app.
-
Once you determined the Jira space that acts as a app repository, navigate to that space settings
-
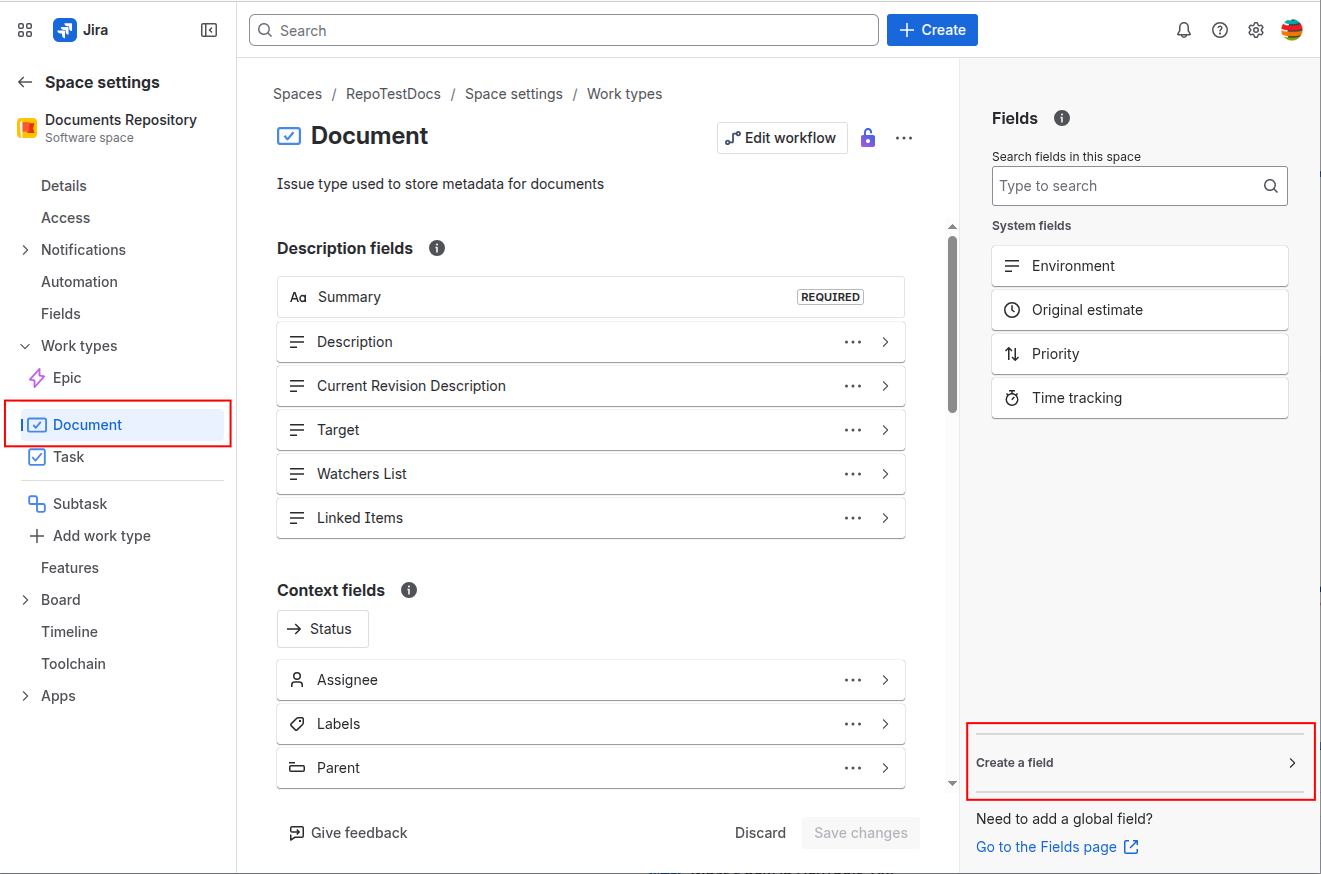
Expand Work types, click Document work type and then click Create a field.
-
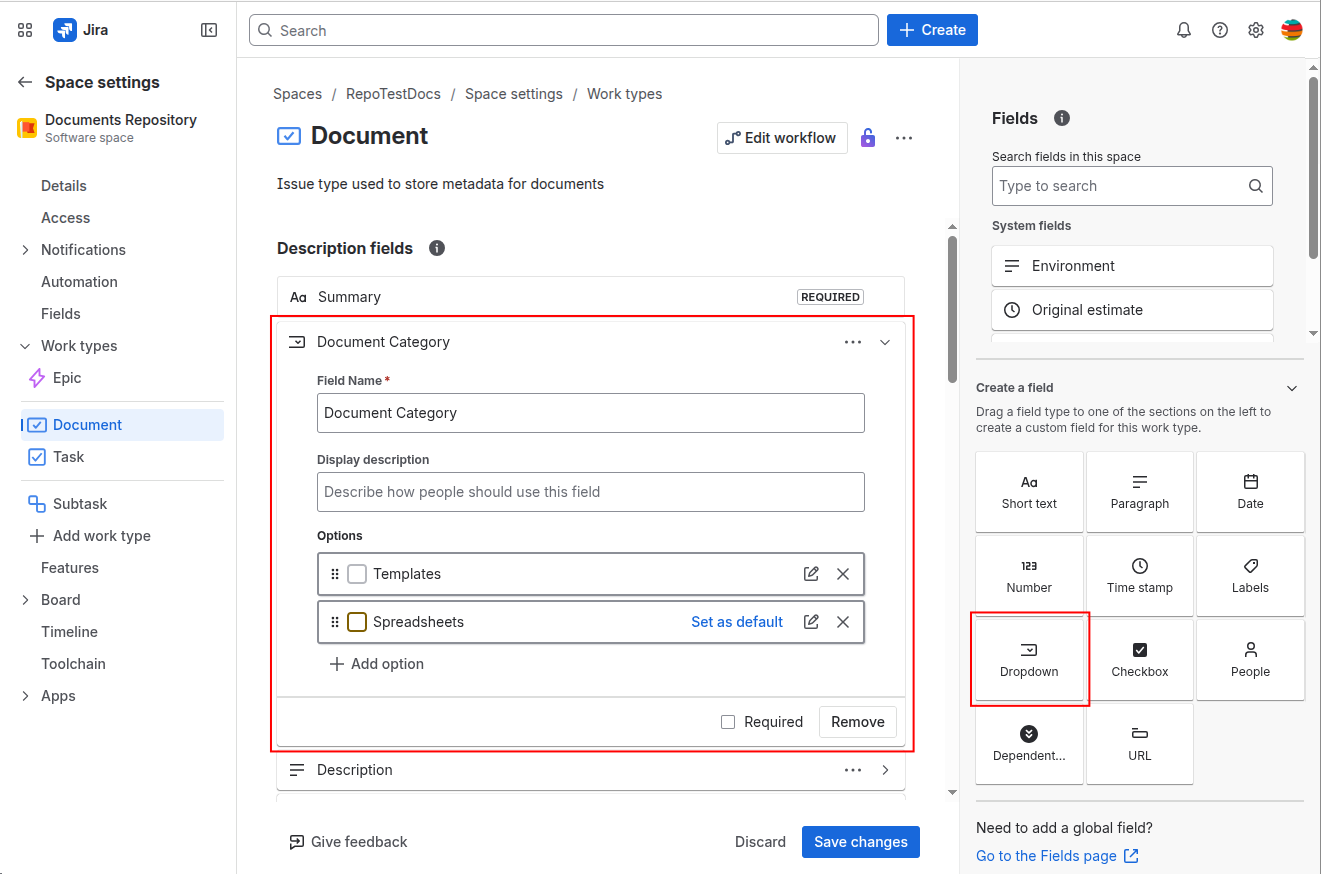
Select the type of the new field. The following field types are supported: Short text, Paragraph, Date, Number, Time stamp, Labels, Dropdown, and URL.
Enter the Field Name, description, and any other information specific to the selected field type. Make sure the field name is unique and does not duplicate an existing field name.
Important
-
Do not mark the field as required at this stage. You will be able to configure this later in Field Configuration section.
-
Do not set a default value for the new field, as default values are not supported by the app.
-
Click Save changes to create the field
-
Repeat the above steps if you want to create additional fields.
At this stage, the field has been created, but it is not yet used by the app. Continue with the next steps to configure the Documents app to start using the newly created field.
-
Navigate to Marketplace Apps > Documents > Repository.
-
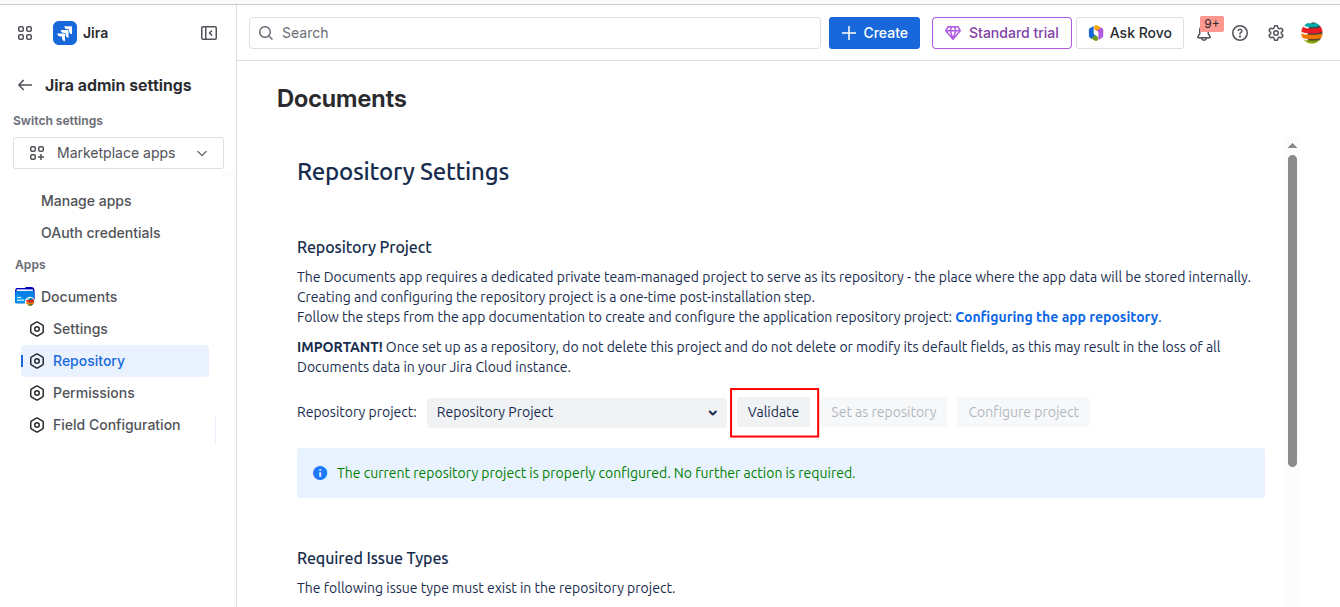
Click Validate. This action validates the existence and configuration of the default fields and also scans the created custom fields.
-
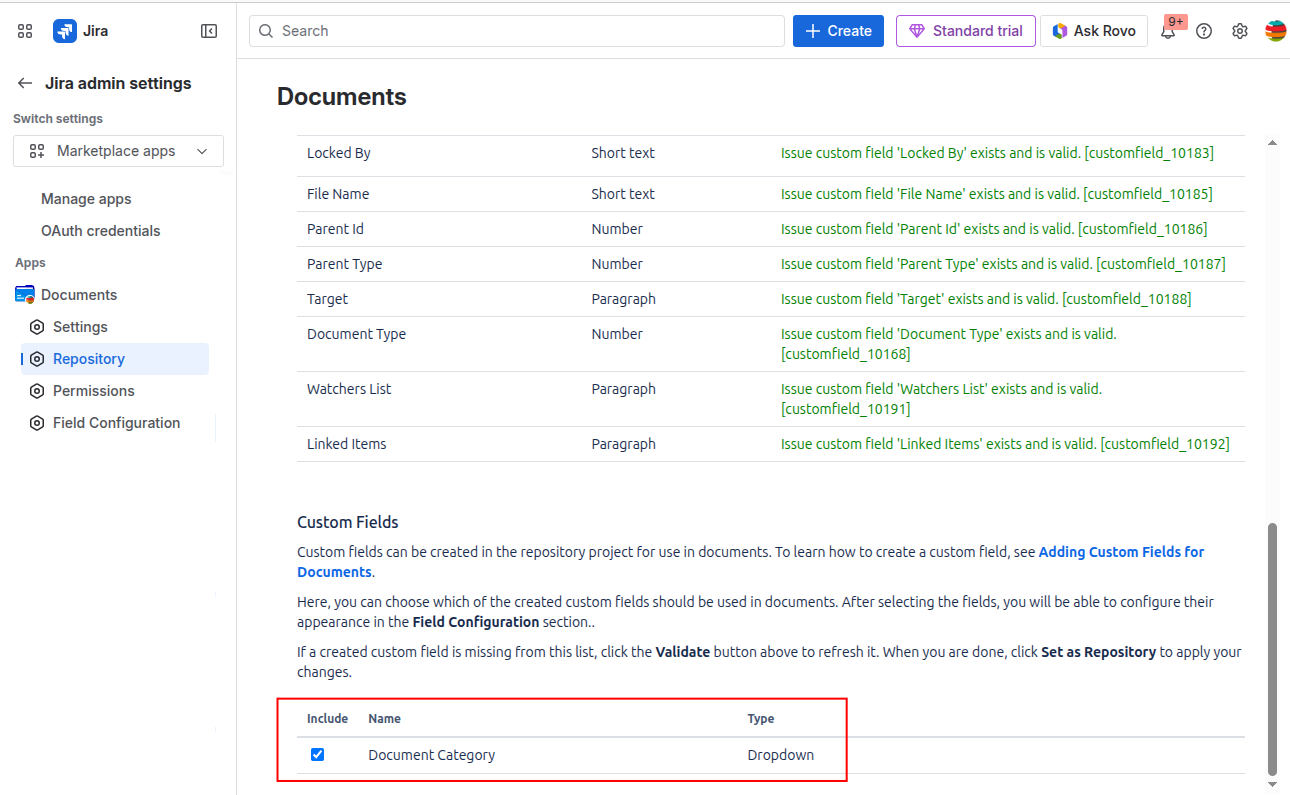
Scroll down the page and select the checkbox next to the newly added field to enable its use in the app.
-
Scroll up and click Set as Repository to save the changes.
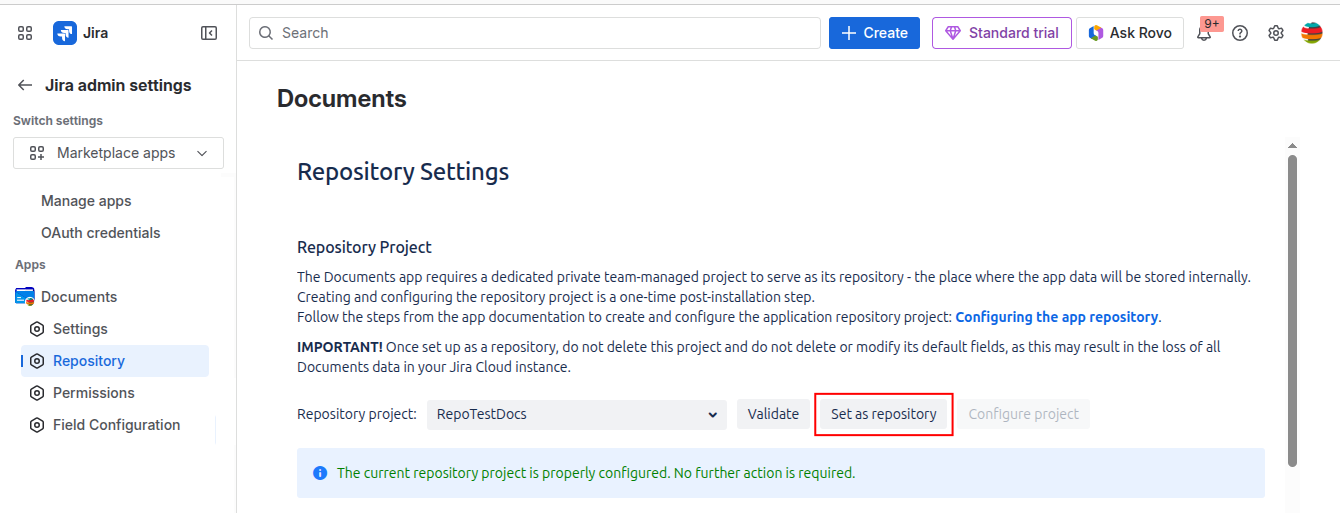
At this stage, the new field is ready to use and is visible in the document Add, Edit, and View screens of the documents.
You can customize the field appearance or mark the field as required in the Field Configuration settings. See Configuring field appearance.
Modifying a custom field
VERY IMPORTANT!
Ensure that the field you want to modify is not a default field. Modifying default fields may cause app malfunctions or document data corruption. Always verify that the field you are modifying is a custom field.
Follow these to modify an existing custom field:
-
Log in to your Jira instance as an administrator.
-
Navigate to Marketplace Apps > Documents > Repository to identify the Jira project (space) that is used as the repository project for the app.
-
Confirm that the field you want to modify is a custom field. It should appear under the Custom Fields section and not under Default Fields.
-
If the field is not listed under Custom Fields, do not continue! Please contact StonikByte Support for assistance.
-
If you have confirmed that the field you want to edit is a custom field, and you have identified the Jira project that acts as the app repository, navigate to the project settings.
-
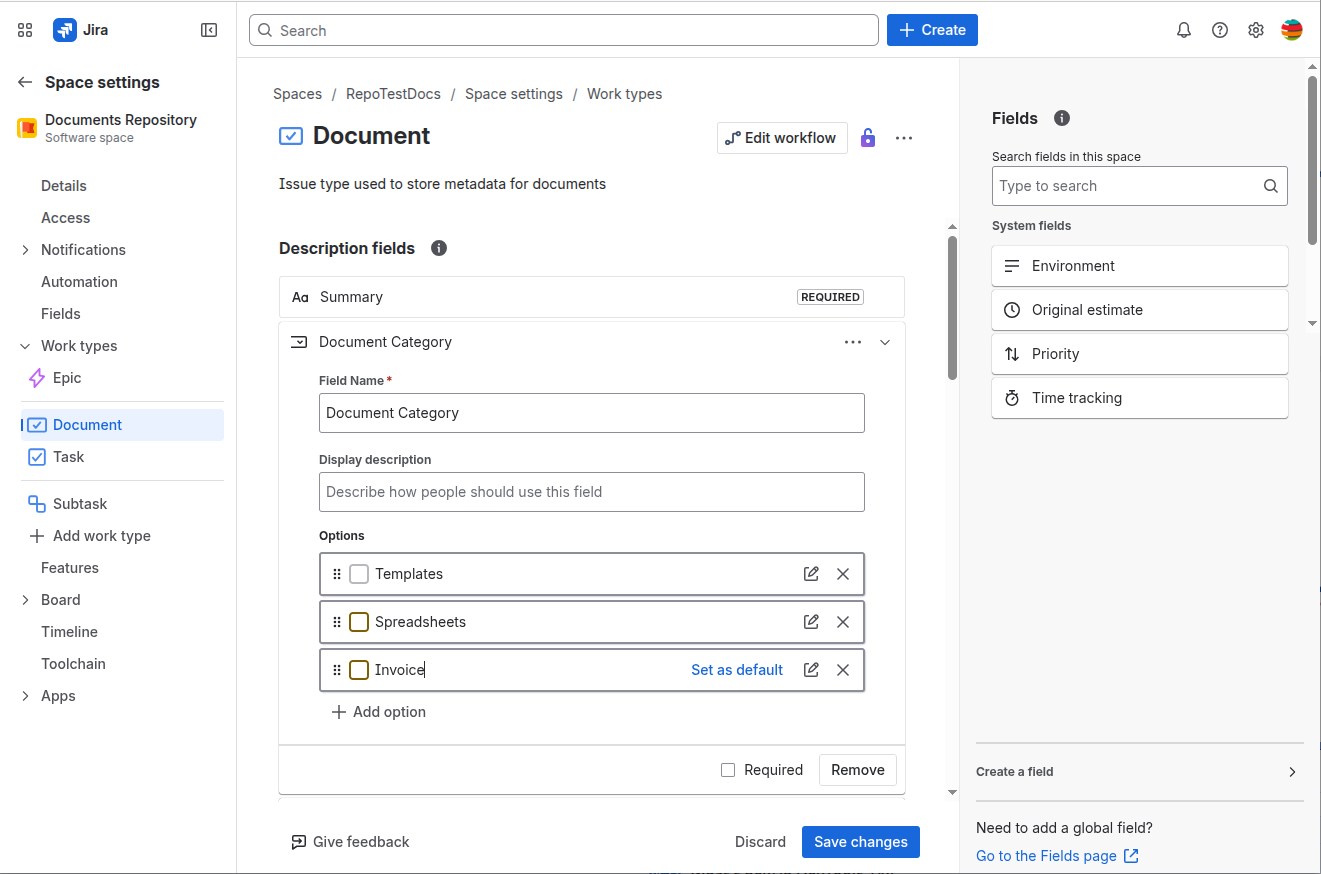
Expand Work types, click Document work type and locate the custom field.
-
Make the necessary changes and click Save Changes.
If you renamed the field, continue with the following steps:
-
Navigate to Marketplace Apps > Documents > Repository.
-
Click Validate. This action validates the existence and configuration of the default fields and also scans the created custom fields.
-
Scroll down the page and verify that the field appears with the new name under the Custom Fields section.
-
Scroll up and click Set as Repository to save the changes.
Deleting a custom field
VERY IMPORTANT!
Ensure that the field you want to delete is not a default field. Deleting default fields may cause app malfunctions and data loss. Always verify that the field you are deleting is a custom field.
Deleting a field is a permanent action and cannot be reversed.
Follow these to delete an existing custom field:
-
Log in to your Jira instance as an administrator.
-
Navigate to Marketplace Apps > Documents > Repository to identify the Jira project (space) that is used as the repository project for the app.
-
Confirm that the field you want to modify is a custom field. It should appear under the Custom Fields section and not under Default Fields.
-
If the field is not listed under Custom Fields, do not continue! Please contact StonikByte Support for assistance.
-
If you have confirmed that the field you want to delete is a custom field, and you have identified the Jira project that acts as the app repository, navigate to the project settings.
-
Expand Work types, click Document work type and locate the custom field.
-
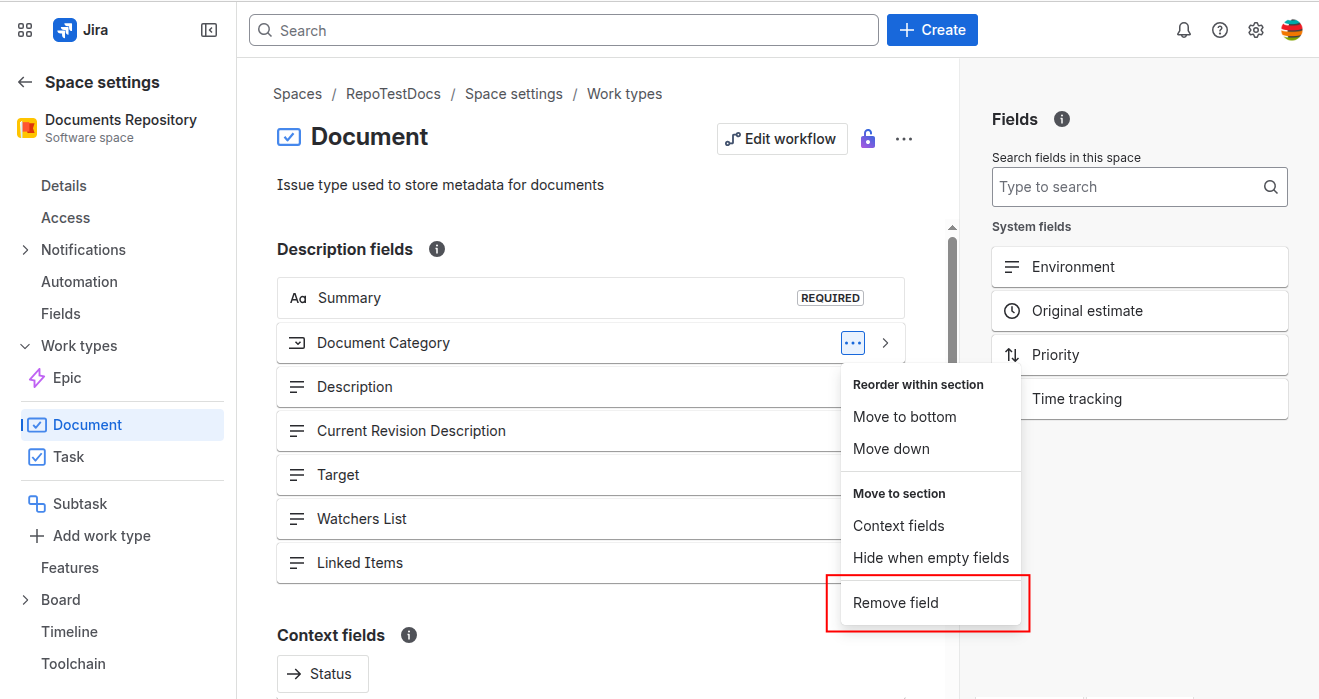
Click its … menu and then Remove field.
-
Click Save Changes.
-
Navigate to Marketplace Apps > Documents > Repository.
-
Click Validate. This action validates the existence and configuration of the default fields and also scans the created custom fields.
-
Scroll down the page and verify that the field no longer appears under the Custom Fields section.
-
Scroll up and click Set as Repository to save the changes.