
Follow these steps to add a new connection to a GitHub instance:
-
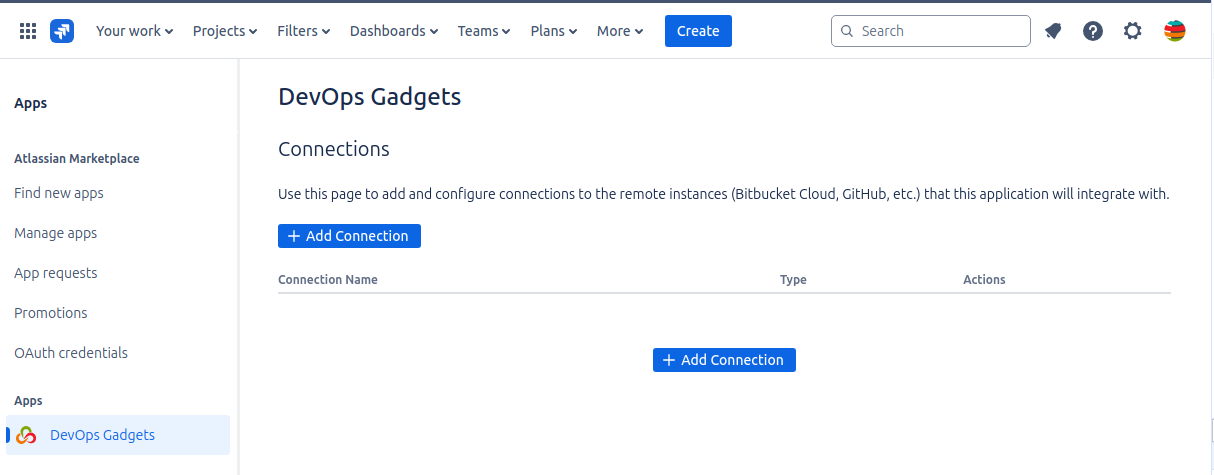
Log into your instance of Jira Cloud as an admin.
-
Go to Apps > Manage Apps > DevOps Gadgets
-
Click Add Connection
-
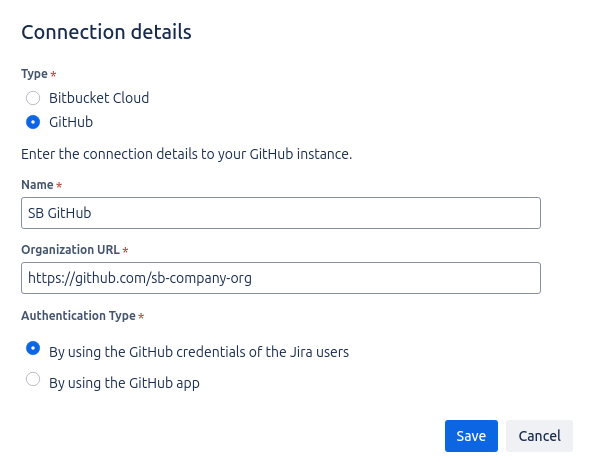
At Type, choose GitHub
-
At Name, type a friendly and representative name for the new connection. This is what the users will see when they configure the app gadgets.
-
At Organization URL enter the URL of the GitHub instance that you want the app to integrate with.
-
At Authentication Type choose between:
-
By using the StonikByte Connector app for GitHub (recommended). Choose this option if you want the app's gadgets to display consistent, organization-wide reporting about commits, pull requests, and pipelines from GitHub to all Jira users, regardless of whether they have permissions in GitHub. In this case, before adding the connection, you must install the StonikByte Connector app for GitHub in the GitHub instance. See Installing the StonikByte Connector app for GitHub.
-
By using the GitHub credentials of the Jira Users. Choose this option if the Jira users who will use the gadgets also have access to the GitHub instance. In this case, when fetching data from GitHub to display in their gadgets, the application will prompt the Jira user for GitHub credentials. Before adding the connection, make sure that you (the Jira administrator) also have access to GitHub.
-
-
Click Save
-
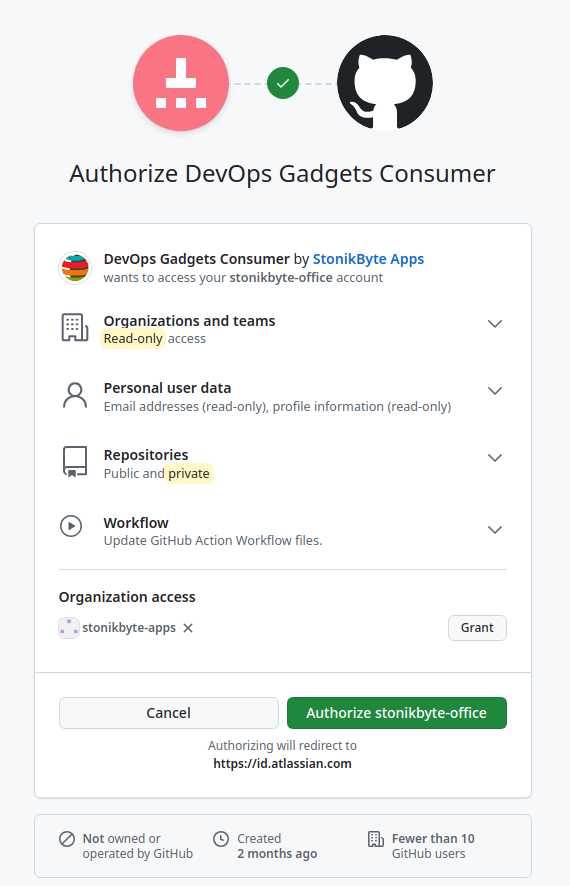
If you selected By using the GitHub credentials of the Jira Users you will be asked to provide access to GitHub:
-
Follow the on-screen steps to provide access to that the app can perform its (read-only) actions. Click Continue.

-
When asked to authorize DevOps Gadgets Consumer, click Authorize stonikbyte-apps.
At this point, the Jira users can start using the app gadgets to display information from the new GitHub connection.