
Great Gadgets supports automated migration from Jira Data Center to Jira Cloud through the Jira Cloud Migration Assistant (JCMA). During the migration, Great Gadgets dashboard gadgets and their configurations are automatically migrated to their Cloud equivalents, helping preserve your existing dashboards and minimize manual reconfiguration.
This automated procedure is recommended when you have many dashboards to migrate and are migrating your Jira data using Jira Cloud Migration Assistant (JCMA).
Note: If you are not using JCMA or have only a few gadgets to migrate, consider using the manual migration procedure described at Manual Migration from Server / Data Center to Cloud.
STEP 1: Install the required apps
Make sure the following apps are installed and updated to their latest versions.
On Jira Data Center:
On Jira Cloud:
-
-
Make sure you configured Data Residency after installing this app.
-
Great Gadgets Migration Assistant is required only for the actual migration. It is not required when running the migration assessment. Once the migration is complete, the app can be safely uninstalled.
The Great Gadgets Migration Assistant is an Atlassian Forge app with the Runs on Atlassian badge. This means that it runs entirely on Atlassian Cloud infrastructure and does not egress data outside of Atlassian Cloud.
The app is installed via a distribution link and is not listed on the Atlassian Marketplace.
STEP 2: Run the migration assessment on Jira Data Center and prepare the data
Before starting the migration, run a migration assessment to identify the Great Gadgets dashboard gadgets that need to be migrated and detect any potential issues.
The assessment provides a report that should be reviewed before proceeding with the migration. Any reported problems should be addressed on the Jira Data Center instance whenever possible.
To run the assessment:
-
Go to Jira Administration → System -> Import and export → Migrate to cloud.
-
Create a new migration and follow the on-screen instructions.
-
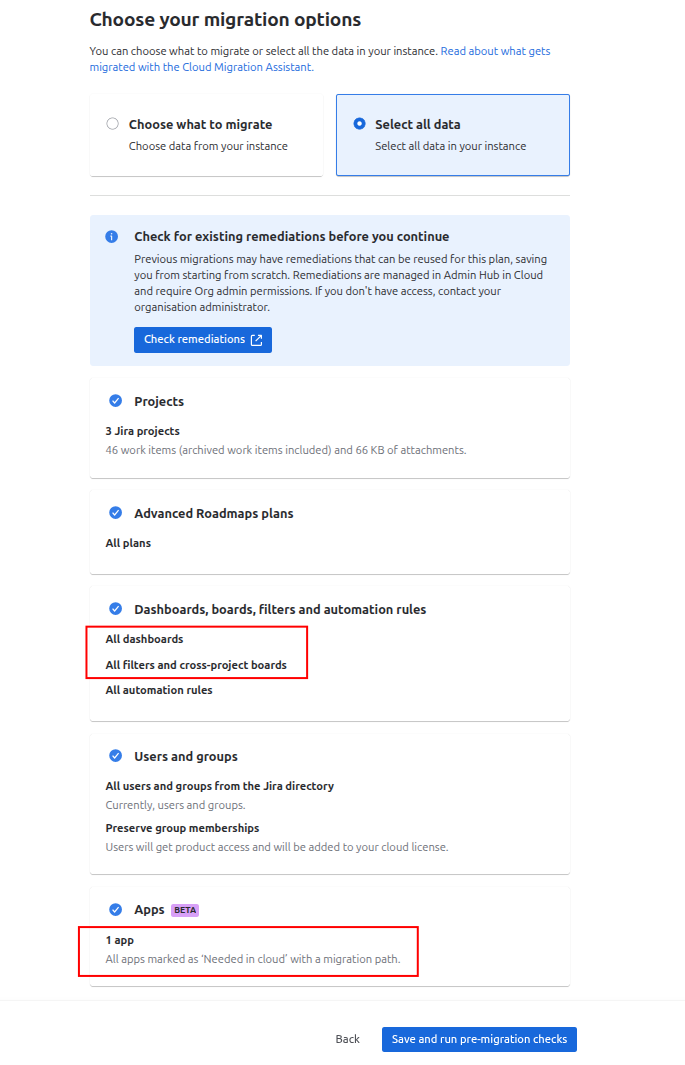
When prompted to select what should be migrated, make sure the following items are included:
-
All dashboards
-
All filters and cross-project boards
-
All apps marked as “Needed in cloud” that have an available migration path
-
-
Click Save and run pre-migration checks and wait for the checks to complete.
-
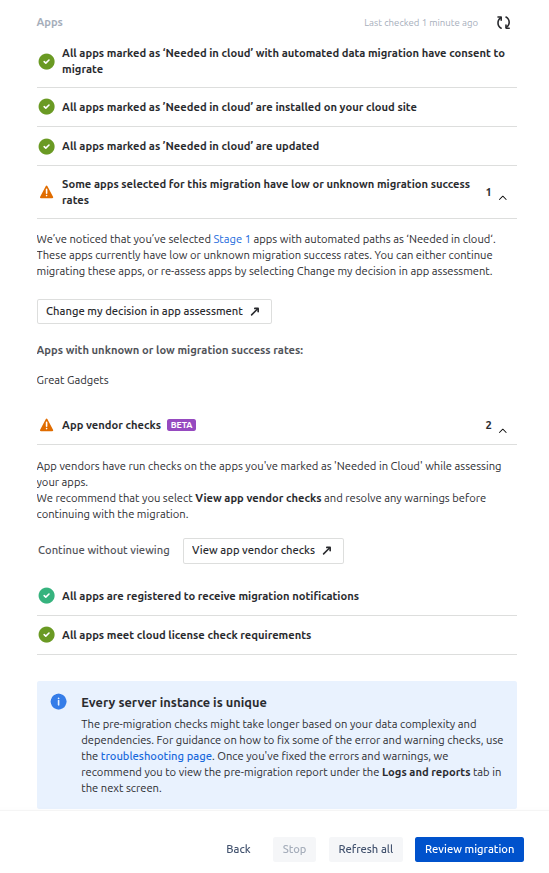
Scroll down to the Apps section and review the app check results.
-
If Great Gadgets is listed under “Apps with unknown or low migration success rate”, you can safely ignore this message. This is expected because the migration path for Great Gadgets was only recently introduced.
-
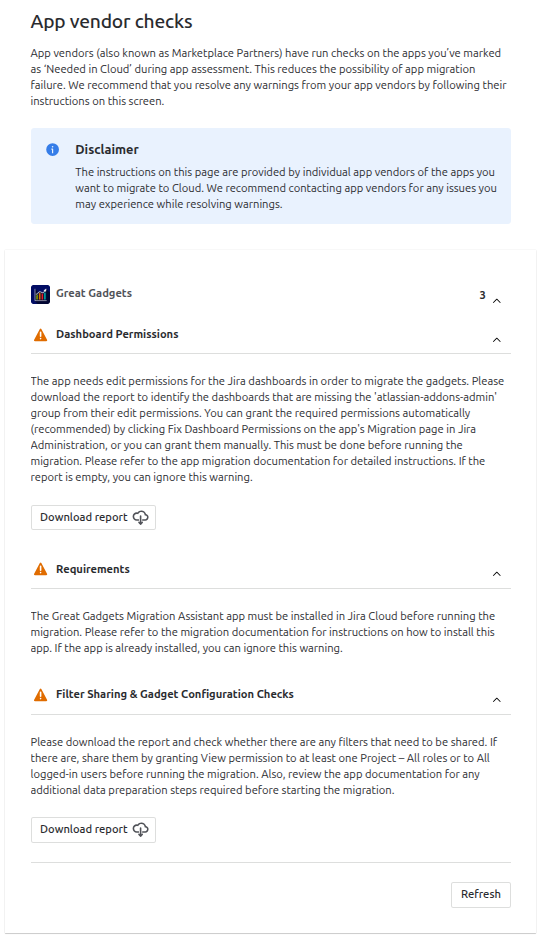
Click View app vendor checks to review the migration checks specific to Great Gadgets.
-
The Dashboard Permissions warning asks you to check whether the Jira dashboards containing app gadgets grant the necessary edit permissions to all roles of a Jira project. These permissions are required for the app to migrate the gadgets.
-
Click Download report. This downloads a CSV file containing a list of Jira dashboards with app gadgets that are missing the required edit permissions.
-
Open the downloaded CSV file in Microsoft Excel or another application that supports CSV files and review the results.
-
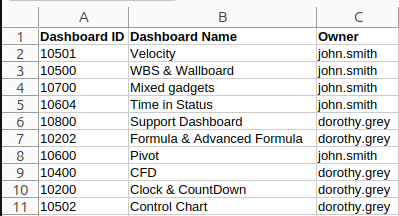
WARNING: The downloaded report may be truncated because JCMA limits these reports to 250 KB. Check the last line of the downloaded report:
-
If it displays “Completed”, the report is complete and can be used as is.
-
If “Completed” is missing, check the first line of the report for the file path and retrieve the complete report from that location under the Jira home directory.

You can fix the dashboard permissions either automatically (recommended) or manually.
-
-
To fix automatically (recommended):
-
Create a temporary project in Jira Data Center. Name it “Temp Project for Great Gadgets Migration“. This will be used only for migration, so you can safely remove it after migration is finished.
-
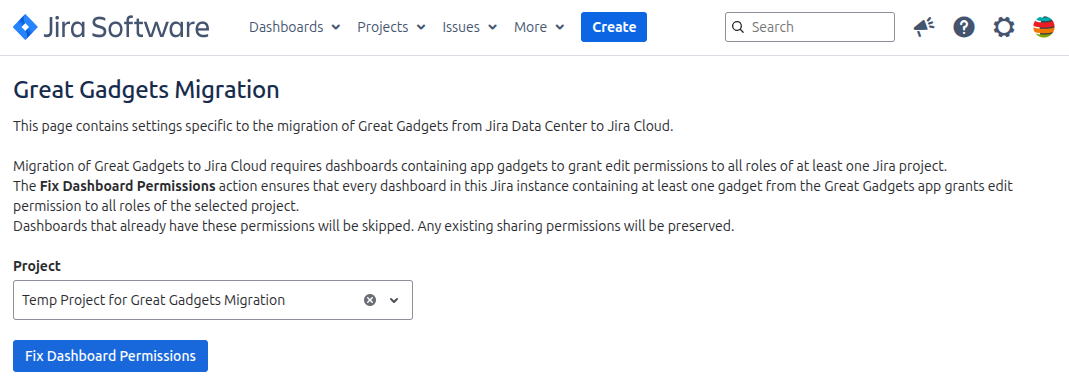
In Jira Data Center, go to Jira Administration > Manage Apps > Great Gadgets Migration.
-
-
-
-
-
Under Project select the newly created temporary project “Temp Project for Great Gadgets Migration“
-
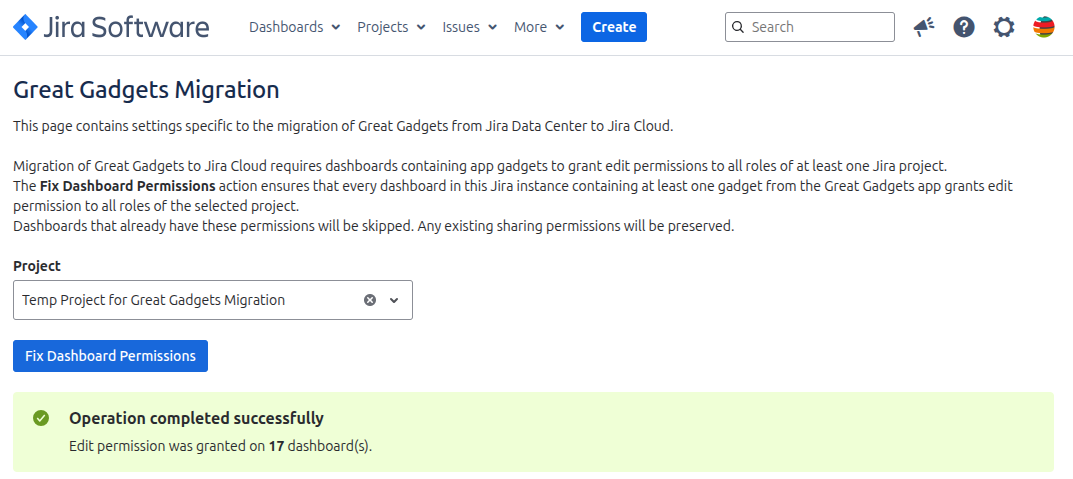
Click the Fix Dashboard Permissions button. The app will grant edit permission to all roles of the selected project for all dashboards containing app gadgets, if not already granted.
-
-
-
-
To fix manually:
-
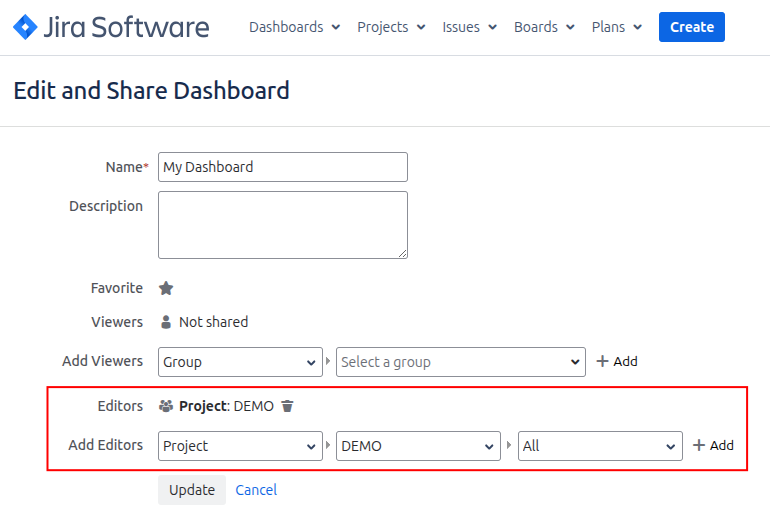
For every dashboard listed in the report grant edit permission to all roles of any Jira project
-
-
-
-
Address the other warnings, then rerun the assessment by clicking Refresh All to confirm that the required dashboard permissions have been granted and that the new report contains no dashboards with missing permissions.
-
-
The Requirements warning indicates that the Great Gadgets Migration Assistant app must be installed on your Jira Cloud instance for the migration to work. Make sure the app is installed before starting the actual migration. See STEP 1: Install the required apps above.
-
For addressing the Filter Sharing & Gadget Configuration Checks warning:
-
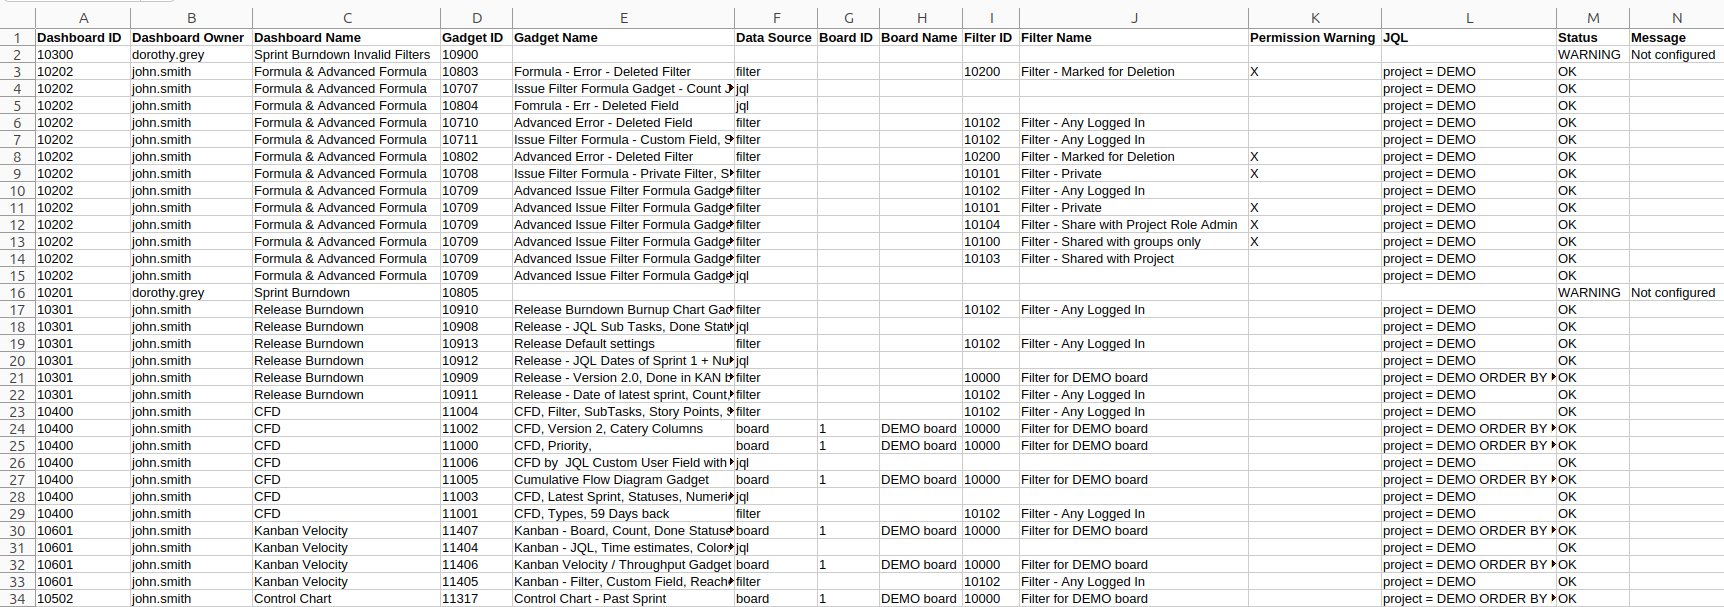
Click Download report. This downloads a CSV file containing details about the Great Gadgets gadgets to be migrated, along with any issues or corrections that should be addressed before starting the migration.
-
Open the downloaded CSV file in Microsoft Excel or another application that supports CSV files and review the results.
-
-
-
Review and correct the following types of entries in the report:
-
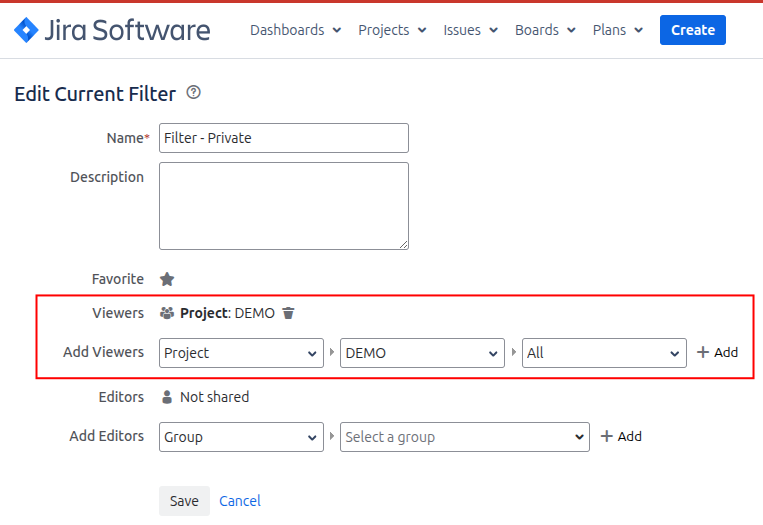
Check the entries where the Permission Warning column contains an X. This indicates that a filter used directly as a gadget data source, or associated with an Agile board used as a gadget data source, is not properly shared. As a result, Great Gadgets might not be able to access the filter in Jira Cloud after migration, causing the gadget to display an error. To fix this, open the corresponding filter in Jira Data Center and update its View permissions to share it with a Project (all roles) or with Any logged-in user.
-
-
-
-
-
Check the entries where Status is WARNING and the Message is Not configured. These represent app gadgets that were added to dashboards but were never configured. We recommend deleting these gadgets from the Jira Data Center dashboards before starting the migration. If you leave them in place, they will not be migrated.
-
Review the JQL column, which contains the JQL of the filters or board filters used by the gadgets. Pay particular attention to queries that use custom JQL functions, such as functions provided by other apps (for example, ScriptRunner). Some of these functions might not have an equivalent in Jira Cloud. In such cases, the affected gadgets might not work as expected after migration and will need to be manually reconfigured.
-
After correcting the identified issues in Jira Data Center, create a new migration in JCMA and repeat the assessment steps above, download a new report, and confirm that the relevant warnings have been resolved.
-
IMPORTANT: If you created the temporary project “Temp Project for Great Gadgets Migration“ at the previous steps, make sure to include it in the new migration.
-
-
-
Once the migration assessment is complete and the identified issues have been addressed, you can proceed to the next step of the migration.
STEP 3: Run the migration
-
You can now trigger the migration in JCMA by clicking the Run button of your current migration
-
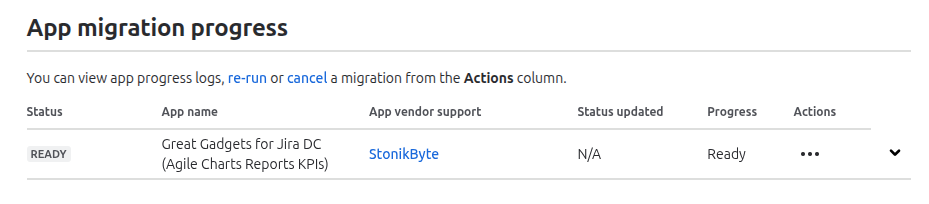
Great Gadgets will appear in the migration under the App migration process section and its migration will start after JCMA migrates the other Jira data.
-
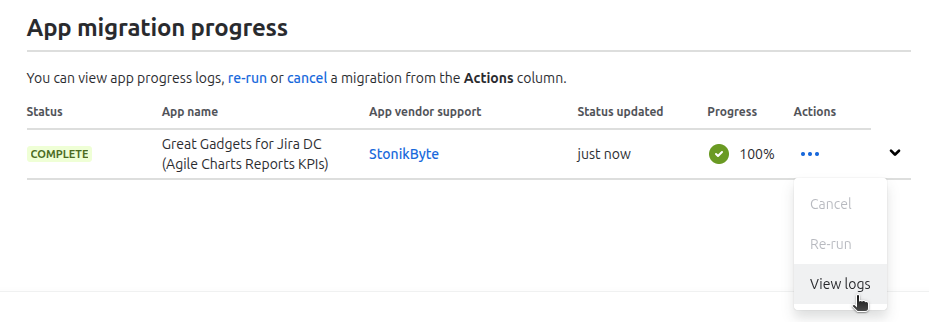
Once the migration is finished you can download the log file showing all the actions performed along with any errors and warnings
STEP 4: Perform post-migration steps
-
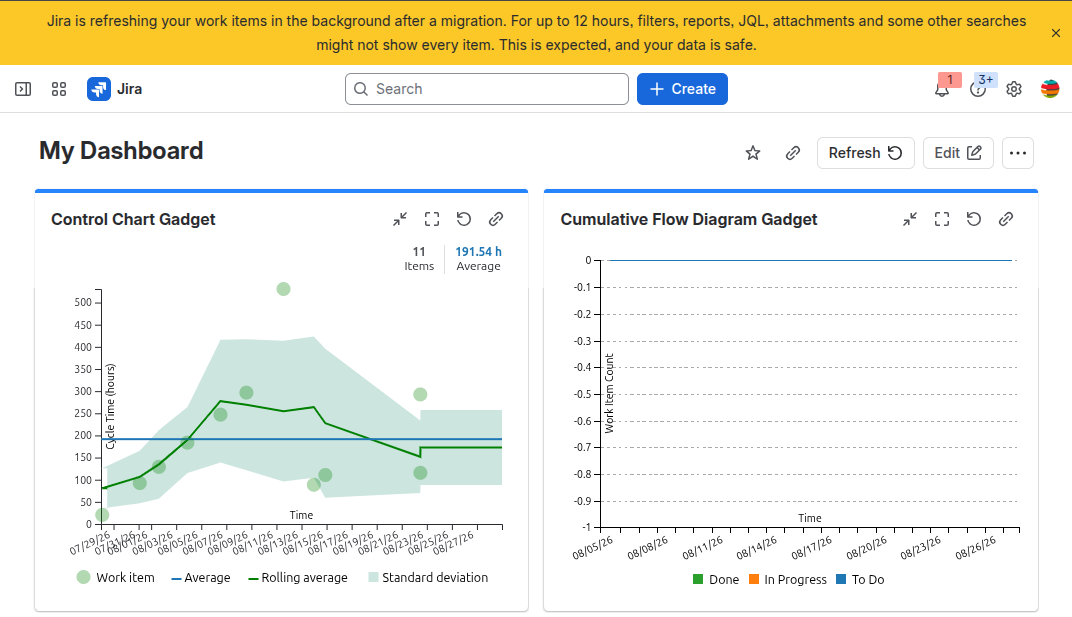
If you migrated Great Gadgets along with your Jira data, Jira might still be re-indexing the migrated data and display a message like this at the top of the page.
We recommend waiting before verifying the migrated gadgets, as Jira filters might return incomplete results during this process, causing the gadgets to display incomplete or incorrect data.
-
Once Jira has finished re-indexing the migrated data, you can start verifying the migrated dashboards. If you resolved all the warnings identified during the migration assessment, all app gadgets are expected to have been migrated with their existing configurations preserved, requiring no manual rework.
-
If a gadget displays incorrect data, it might be due to cached data generated before Jira finished re-indexing the migrated data. In this case, try enabling the Refresh cached data at next display option (if available) from the More settings tab of the gadget configuration.
-
You can re-run the migration if needed. In this case the gadgets that have already been migrated will not be duplicated; their configurations will simply be updated.
-
It is now safe to delete the temporary project “Temp Project for Great Gadgets Migration” from Jira Cloud if it was created to fix dashboard permissions. DO NOT DELETE this project from Jira Data Center, as doing so might prevent the dashboards from being edited further.
Known Limitations
-
We preserve the order of the app gadgets as they were in Jira Data Center. However, if a dashboard also contains Jira native gadgets or gadgets from other apps, we cannot guarantee that the overall gadget order will be preserved. In this case, the gadgets may need to be rearranged manually after migration.
-
If you have app gadgets imported as macros into Confluence Data Center and added to Confluence pages, they will not be migrated automatically through this process. See Migration of app gadgets used as macros in Confluence pages for instructions on how to migrate them.
For any questions or assistance with the migration, feel free to contact StonikByte Support by raising a ticket through our Support Portal or by emailing us at support@stonikbyte.com.